MicroHam Support
Starting in version 1.45, Win4K3Suite now offers support for the following MicroHam products:
MK2R and MK2R+
Microkeyer II
Digikeyer II
Station Master and Station Master Deluxe.
Please be sure to download the latest firmware for your MicroHam product from their web site.
Setting up Win4K3Suite to work with the MicroHam Products
Concept
Before using Win4K3Suite with the MicroHam products please take a look at the following block diagram of the architecture of Win4K3Suite. This is important to understand how your overall system will function when it is operational.
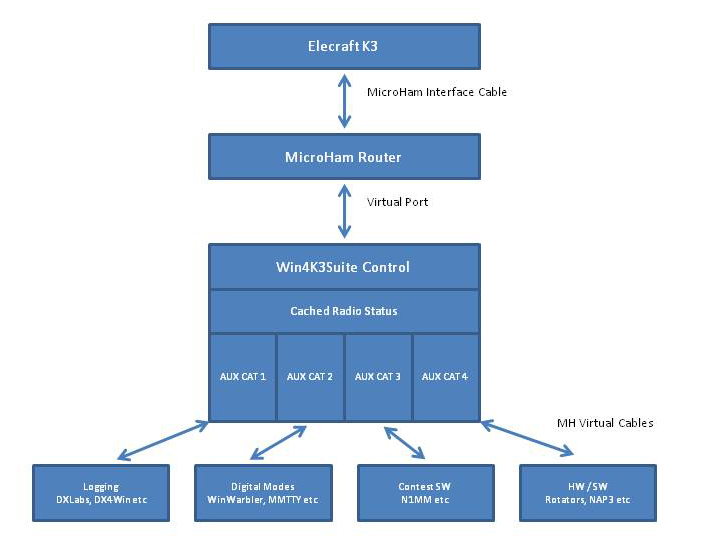
Win4K3Suite caches all commands that it polls for. This cache therefore contains the current status of virtually all K3 components. The status is exposed to the outside world through 4 logical serial port interfaces called the AUX /CAT ports. Each of these ports can connect to an external program via a com port pair. The com port pair is created using the MicroHam “Virtual Cable”. This creates for example a pair of com ports such as “COM8” and “COM9”. The idea is that Win4K3Suites AUX / CAT ports will connect to one of the com ports let’s say COM8 and the third party product such as N1MM, will connect to the other, COM9 using the connection that N1MM usually uses for the K3. The result is that N1MM “sees” a K3 attached to it. It polls the K3 and the responses are sent by the AUX / CAT port. Since the responses are cached, the results are returned almost instantaneously without a need to actually poll the radio. If N1MM wants to send a command to the K3 to QSY for example, the command is sent as needed.
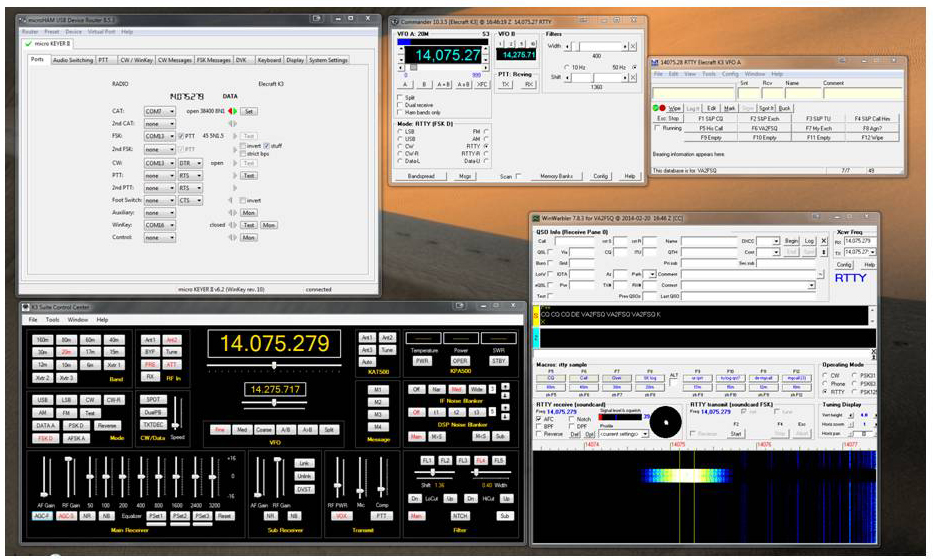
Example Setup of the MicroKeyer II, DXLabs Suite with MMTTY, and N1MM
The first item that needs to be done is to make sure that the MicroHam is connected to the radio and operational. Once this is done, follow the following steps:
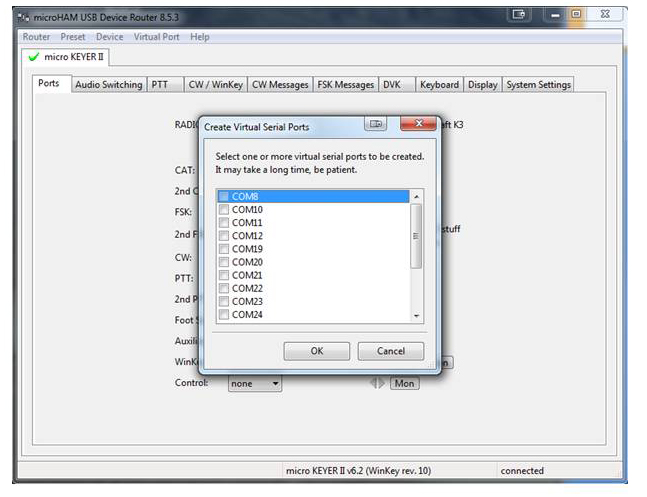
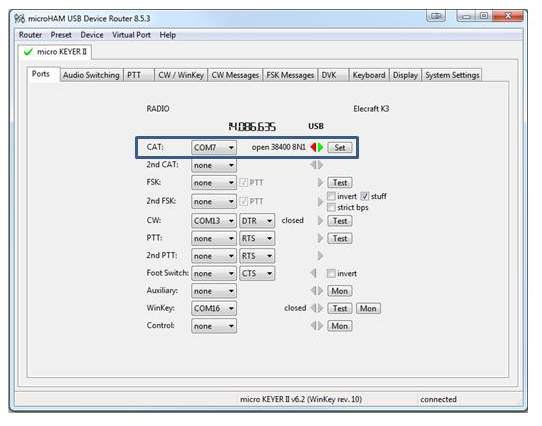
Step 1: Create a Virtual Port with the MicroHam Virtual Port menu. For this example, COM 7 was already created.
Step 2: Open Win4K3Suite and connect to the virtual port create above. If Win4K3Suite had already been connected to another port you will have to disconnect and restart.
Step 3: Verify that the MicroHam console is connected to Win4K3Suite as shown below.
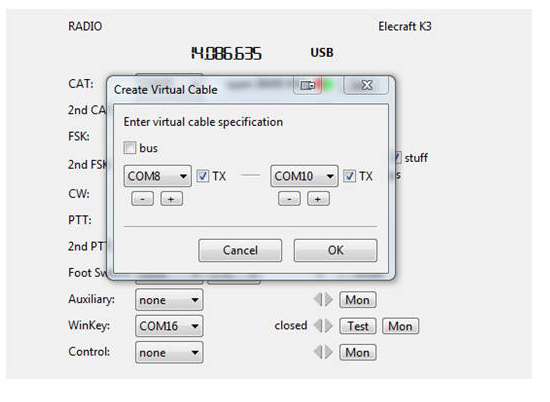
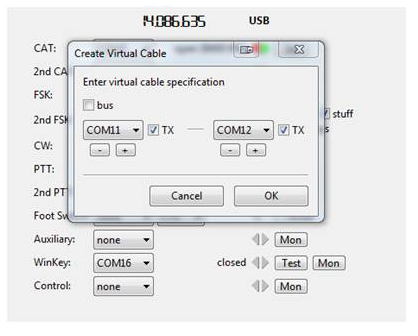
Step 4: Using the MicroHam menu item “Virtual Port” select “Create Cable” You will need to have two ports shown. In the first example I created COM8 to COM10, and in the second example, COM11 to COM12.
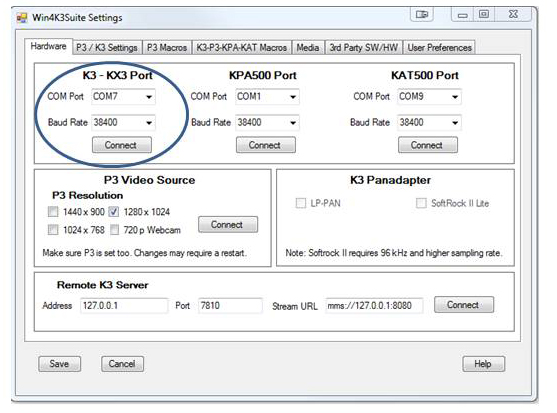
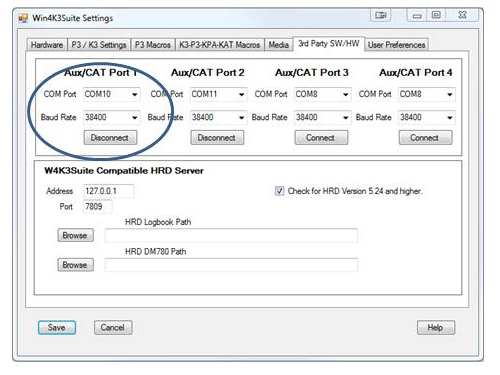
Step 5: Close Win4K3Suite and open it again. This allows Win4K3Suite to see the newly created com ports. Open Tools Settings and click on the 3rd Party SW-HW tab.
Next connect an AUX/CAT port to one of the com port pairs created above. In this picture I have connected AUX / CAT port 1 to COM10 leaving COM8 from the pair to connect to N1MM (N1MM has a maximum of 8 com ports available). In addition, I have connected AUX/CAT Port 2 to COM11 which will be used for DXLabs.
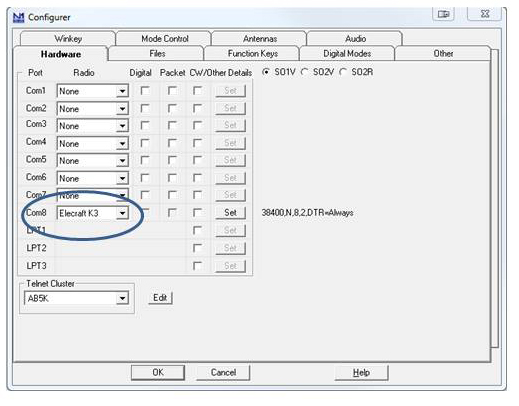
Step 6: Start up N1MM and go into the Hardware tab. In the entry for COM8 select the Elecraft K3 and close the N1MM window. You should now be connected to N1MM.
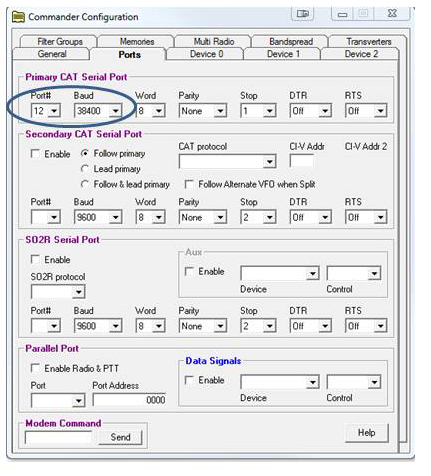
Step 7: Open DXLabs Commander and go into the settings and select the radio to be the Elecraft K3 and the CAT port to be COM12. DXLabs should now be connected.
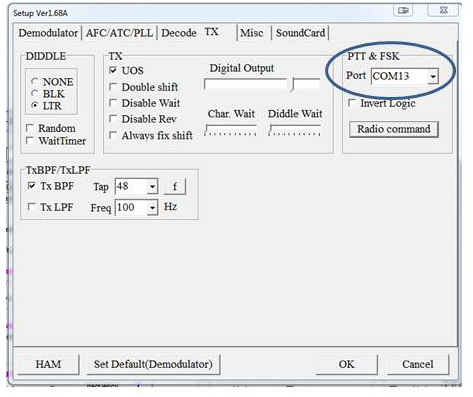
Step 8: Open WinWarbler and configure it for RTTY, and in the MTTY setup, select another virtual port created in the MicroHam to connect PPT & FSK
The result is that each of the applications are now talking the the MicroHam router through Win4K3Suite.
Please note, that all CAT control in any application used should go through Win4K3Suite and not through the MicroHam. In addition, any PTT or DTR type commands should be configured through the third party application using a different port than the one Win4K3SUite is connected to the MicroHam.